Tool Search: Application Manager
The Application Manager lists the sites of food service (schools) and the types of service (food options/menus) available at that location. New schools must build a list of applications.
Food Service administrators can create new applications and services at any time. For a detailed setup of the Application Manager, refer to the Point of Sale Best Practices article.
The application (the name of the school) for the POS service must be created before the Services (POS menu layouts) can be created.
Using the Applications and Service Tree
The Applications and Services tree provides an organized view of how different Applications, Services, and schools are nested within the Application Manager. To expand the details of a particular Application, click on the triangle next to its name. Similarly, expanding a Service will reveal the list of schools that the Service is available for.
To edit any information related to an Application or Service, click on the name of the Application or Service. This will open up the Application or Service Detail side panel, depending on which you clicked on.

Create a New Application

- From the Application Manager, click the New Application button. The Application Detail section appears to the right of the Application Tree.
- Enter a Name for the application.
- New Applications will be Active by default. Uncheck the Active checkbox to inactivate it. (Optional)
-
Select the Reminder Enabled checkbox to display system warnings on the point of sale. (Optional)
This checkbox turns on the reminder levels for all students in the school if the reminder checkbox and reminder levels are set for the students on the student's accounts. Cashiers must click a pop-up message on the POS screen when this option is selected.
- Click the Save icon when finished. The new application is listed in the Application Tree in alphabetical order and services can be attached to it. Inactive applications are sorted to the bottom and hidden upon page load.
Filter Descriptions
| Filter | Description |
| Filter by Applications | Limits the Applications and Services tree to only show the Applications that have been selected. |
| Show Inactive Applications | When turned ON, Applications with an unchecked Active checkbox in their Application Detail panel will display within the Applications and Service tree. |
| Filter by Services | Limits the Applications and Services tree to only show Applications that include the Services that have been selected. |
| Filter by Schools | Limits the Applications and Services tree to only show Applications assigned to the selected schools. |
Create Services
After creating the application and all desired services, the Service Layout can be viewed and adjusted as necessary.
Important Information about Services
- The menu is not based on rotating menus. This is the menu for ALL items that will be served.
- Only Serving Periods marked Active within the Attribute Dictionary are allowed to be assigned to services. If you inactivate a Serving Period, you must complete the following tasks:
- Reselect an active Serving Period for all Services assigned to the inactive Serving Period.
- On the POS Terminal, reload POS data and restart the POS Terminal application to remove the Serving Period from appearing on the POS for use by a cashier during login.
- Do NOT inactivate a Serving Period during school hours when meals are being served or during the school year.
- Only Serving Periods marked Active within the Attribute Dictionary are allowed to be assigned to services. If you inactivate a Serving Period, you must complete the following tasks:

- Select the Application to which you want to assign services.
- Click the Add Service button. The Service Detail side panel displays.
- Enter the Name of the service.
- Select the Serving Period.
- Enter a Description of the service. (Optional)
- Select the appropriate schools using this service from the list of schools.
- Click the Save button when finished. The new service is listed under the Application to which it is assigned in the Application Tree. Repeat this process for as many services or menus as needed for the application.
Create Service Layouts
The Service Layout provides a way to customize what the POS terminal screen will look like as the students go through the lunch line. You can increase and decrease the size of the item button, add button color, change the font size, and arrange buttons in a layout.
Access the Service Layout

- Select an Application.
- Click View from Available Services.
- Click Service Layout.
Assign Buttons
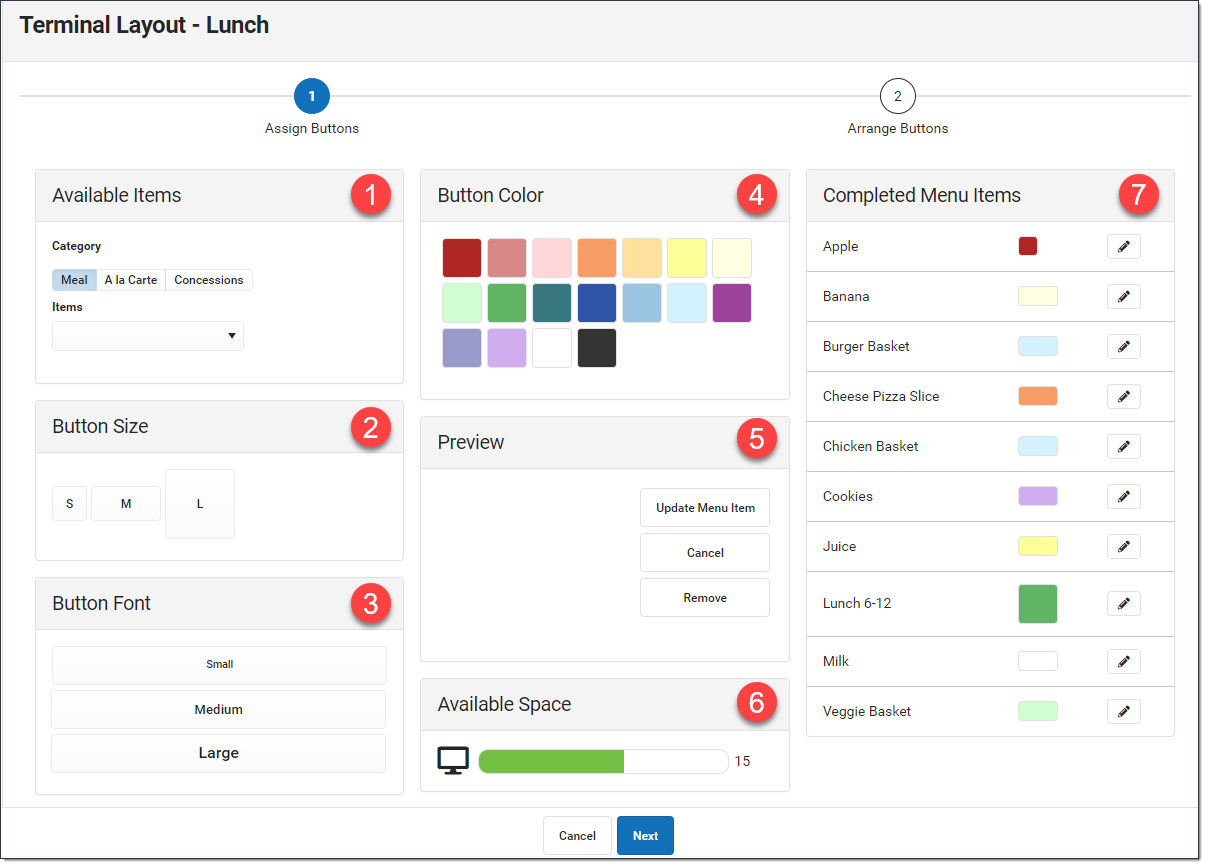
The Assign Buttons screen is where you create the buttons for menu items. Use the field descriptions in the table following this image to complete this screen.
|
#
|
Field | Description |
|---|---|---|
| 1 | Available Items |
The category buttons can be used to filter only items in the selected category |
| 2 | Button Size |
Available space for buttons is 32.
Campus will not let you select a button size if it exceeds the available space. |
| 3 | Button Font | Select from small, medium, and large options.
|
| 4 | Button Color |
|
| 5 | Preview | This section displays a preview of the button you created. Click the Update Menu Item when you are done creating the button. Campus adds the button to the Completed Menu Items.
You can update completed menu items by clicking the edit button. After you make changes, click the Update Menu Item button in the Preview section. If you change your mind, click the Cancel button. You can also click Remove to delete the button. 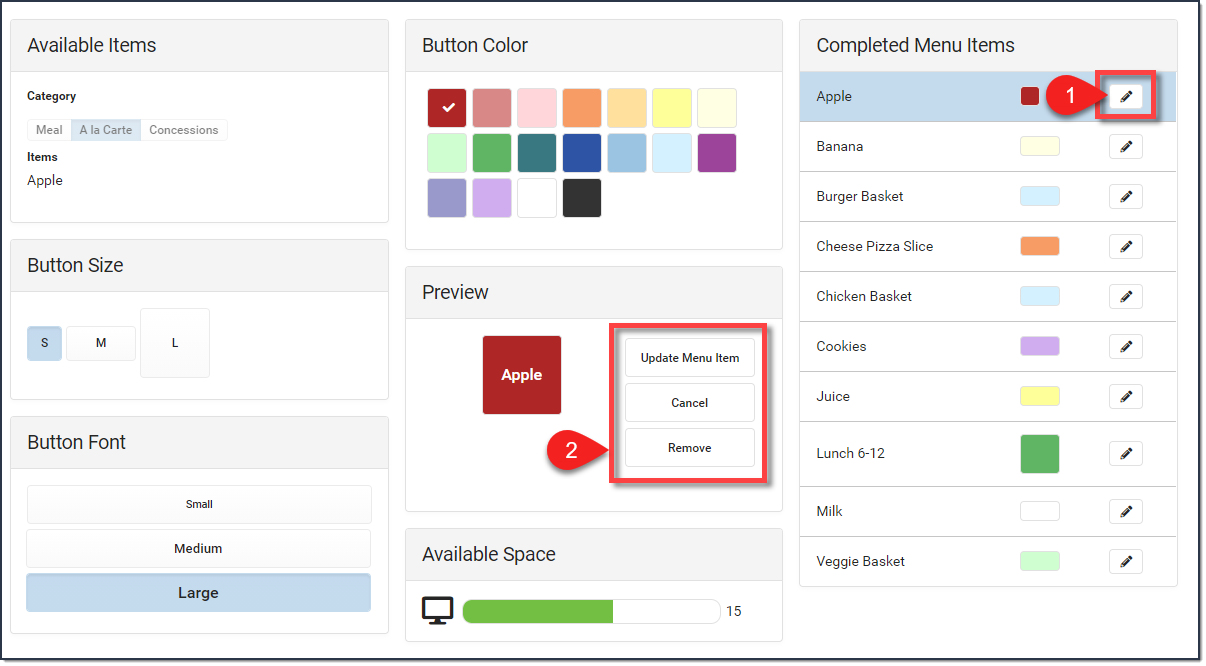
. |
| 6 | Available Space |
The available space for buttons is 32. Campus keeps tracks of available space as you add buttons. If the available space is negative, you must remove some buttons from the completed menu. |
| 7 | Completed Menu Items | Once a button is added is displays in the Completed Menu Items. You can edit (update) completed menu items by clicking the edit button. |
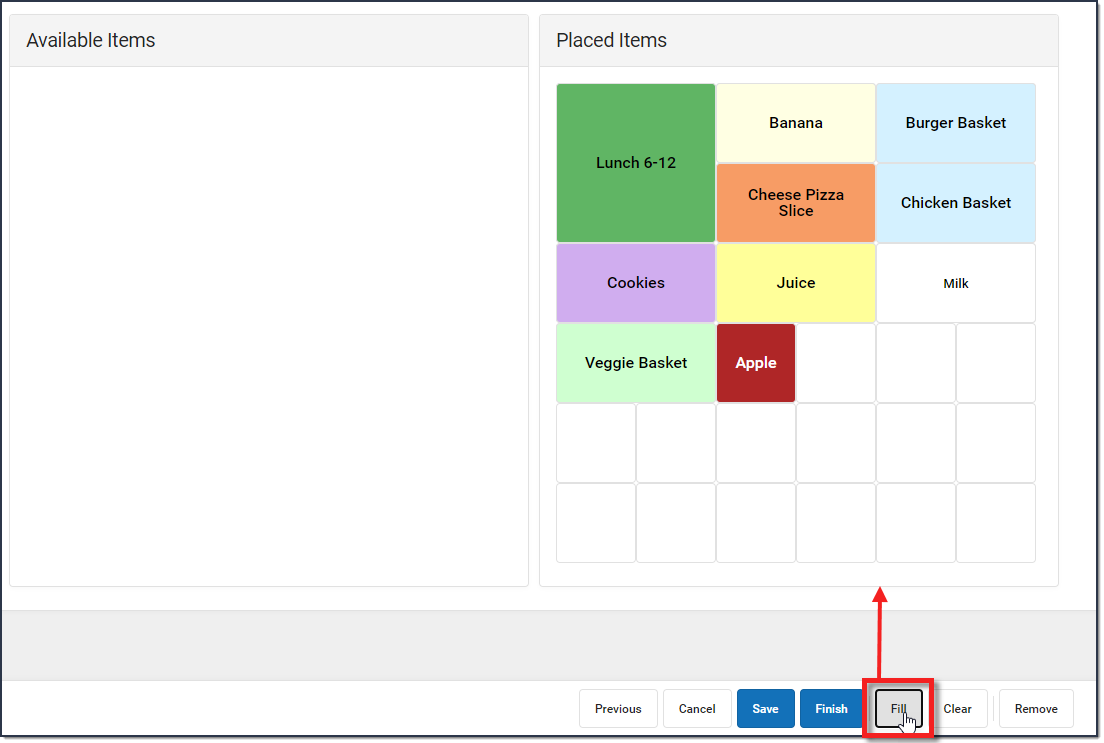
Arrange Buttons
Buttons set up on the Assign Button page appear in the Available Items section of the Arrange Button page. Buttons can be placed by using the Fill button, manually adding buttons one at a time, or a combination of both methods.
Tips
- Before you click and place the item, hover your cursor on the grid. Campus highlights the squares that the button will occupy.
- To remove a single button, select the button in the Placed Items section then click the Remove button. Campus moves the button back to the Available Items section.
- Select the Clear button to remove all of the buttons from the Placed Items section.
| Method | Description |
|---|---|
| Fill | When you click the Fill button, Campus automatically places the buttons exactly as they appear in the Available Items.
 |
| Manually Add | Click on the button in the Available Items section then click where you want the button placed in the Placed Items section.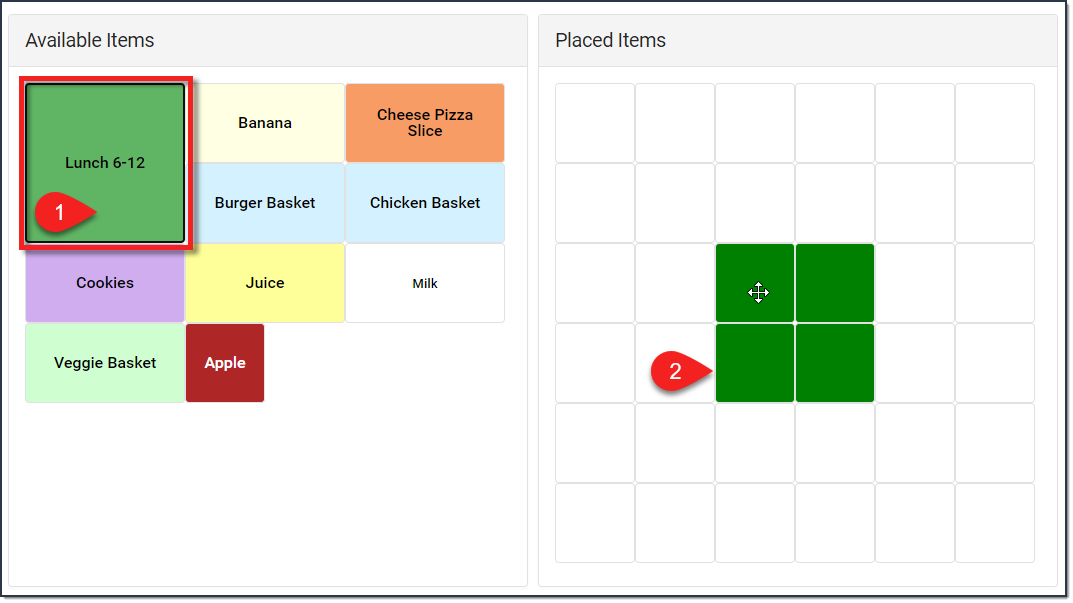 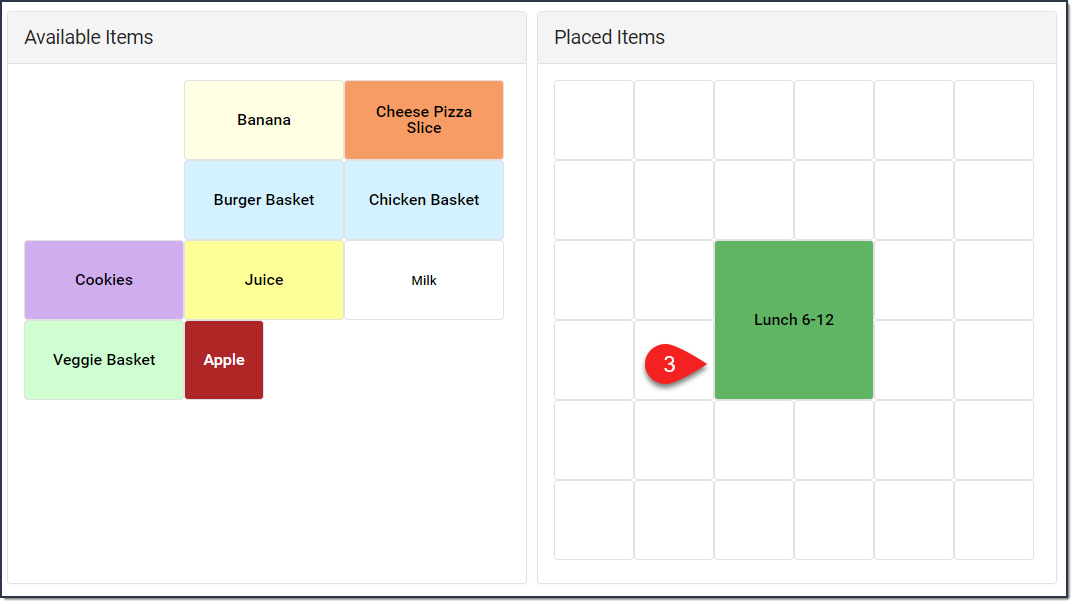 |
| Combination of Manually
Add and Fill |
Place some of the buttons as you want to see them on the layout then click Fill. Campus adds the remaining buttons in the open squares. |
