There are 8 types of questions for Quizzes in Campus: When you're creating a quiz, questions are Multiple Choice by default. Click Change Question Type to select a different type.
|
 Click Change Question Type to see the list of options. Click Change Question Type to see the list of options. |
Multiple Choice
For Multiple Choice questions, students select the correct answer(s) from a list of options.
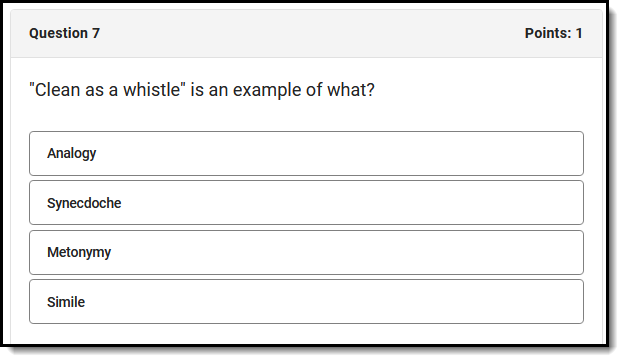 Select the correct answer for a multiple choice question.
 Create a Multiple Choice Question
- Enter the question text in the editor.
- Indicate if the question has Multiple Answers. If marked, more than one answer can be marked as correct.
- If Multiple Answers is marked, indicate if the question should Allow Partial Credit. If marked, students receive partial credit if they select some of the correct answers but not all.
- Mark Randomize Response Order to randomize the order in which answers display.
- Enter Possible Answers, with the radio button marked next to the correct answer. If Multiple Answers is marked, mark the checkboxes next to all correct answers.
- Click Done when finished.
True/False
For True/False questions, students indicate whether the question text is true or false.
Create a True/False Question
| 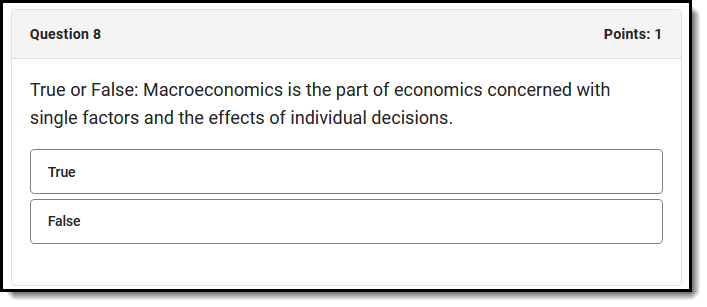 Example of a True/False Question Example of a True/False Question |
Essay/Short Answer
For Essay/Short Answer questions, students type their answers to the prompt.
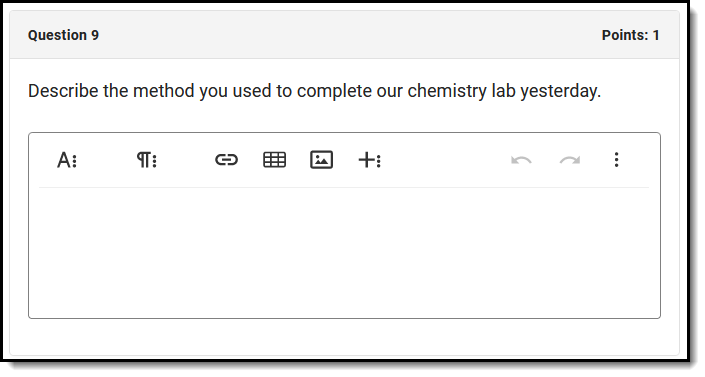 An example of an Essay/Short Answer question with a Rich Text editor.
 Create an Essay/Short Answer Question
- Enter the prompt in the text editor.
- Indicate if the students should have a Plain Text or Rich Text editor when they respond.
- If using a Plain Text editor, students cannot format their responses. If this option is selected, a Word Limit field displays. Enter the maximum number of words for student responses.
- If using a Rich Text editor, students can format their responses in an editor that matches the one you use when writing quiz questions.
- Click Done when finished.
If your quiz includes Essay/Short Answer questions, you may want to change the Release Scores setting to release on a specific date. Because this question type cannot be auto-scored, the auto-calculated score does not reflect these questions until the teacher has scored them. As a result, the student's score would appear lower than it actually is.
Fill in the Blank
For Fill in the Blank questions, students fill in the blanks in the entered text, either by typing an answer or selecting an answer from the dropdown list.
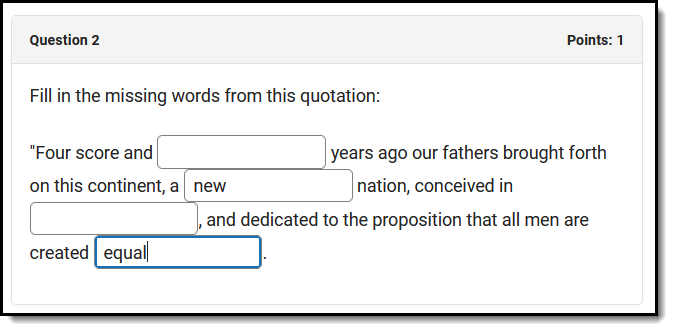 Fill in the Blank question with typed answers Fill in the Blank question with typed answers |
 Fill in the Blank question with answers in dropdown lists. Fill in the Blank question with answers in dropdown lists. |
Create a Fill in the Blank Question
- Enter the question text in the editor. Wherever there should be a blank for students to fill in, click the Add Blank Response button
 . Each blank response corresponds to an answer below, Response 1, Response 2, etc
 - Indicate if the question should Allow Partial Credit. If marked, students receive points for the question based on how many blanks they fill correctly. If not marked, the student must fill all blanks correctly to earn any points for the question.
- Indicate if the Response Type should be Text Entry or Drop Down.
- Enter the correct answer for each blank response field. For example, the first blank response in the question text corresponds to Response 1, the second to Response 2, etc.
- For Text Entry, type the correct answer. Add additional correct answers as applicable, such as "seven" and "7".
- For Drop Down, type the correct answer as well as the distractor options that are also displayed in the dropdown list. Mark the checkbox next to the correct answer. Answer options display in the dropdown list in the order shown.
- If desired, expand Correct Answer(s) and Settings to verify question setup.
- Click Done when finished.
Number Line
For Number Line questions, students place answer options (called Number Line Points) in their correct position on the number line. Students are presented with the question instructions, followed by the number line with options below it. Students click and drag the options to their correct place on the number line.
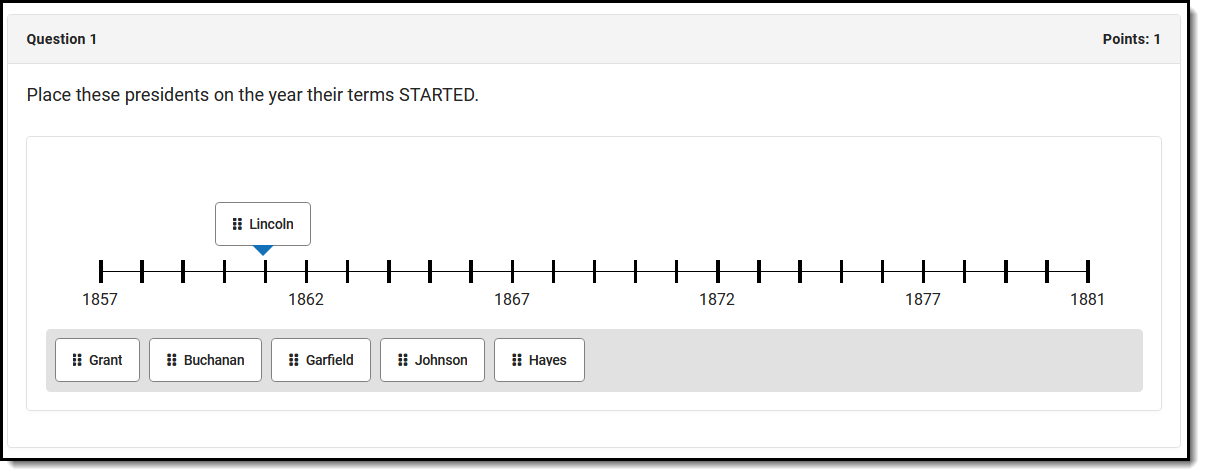 Drag options to the correct place on the Number Line.
Create a Number Line Question
- Enter the question text in the editor.
- Mark Settings as desired, based on the descriptions in the next section. As you determine settings, scroll down to the bottom of the question to see how the settings are applied.
- Enter Number Line Points for each option students must place on the number line. Four points are shown by default; click Add Points to add options.
- In the number line that displays, click and drag each of the points to its correct place on the number line.
- Expand the Correct Answer(s) and Settings section to verify the placement of each option. If Snap to Tick is not enabled, the location of each option is expressed as a decimal rounded to the hundredth place.
- Click Done when finished.
Number Line Settings
The following settings apply to Number Line questions:
- Allow Partial Credit: If marked, students receive points for the question based on how many options they placed correctly. For example, if the question had 10 options, was worth 10 points, and the student placed 7/10 options correctly, they would receive 7 points. If the question was worth 5 points, this student would receive 3.5 points. If not marked, the student must place all options correctly to get any points for the question.
- Minimum Value and Maximum Value: The lowest and highest options on the number line.
- Tick Distance and Ticks Per Label: The Tick Distance is the numerical value represented by each tick. The Ticks Per Label value is how frequently ticks are labeled. For example, if the number line goes from 0 to 100 and the Tick Distance is 5, ticks display at 0, 5, 10, 15, etc. If the Ticks Per Label is 2, ticks 0, 10, 20, 30, etc, are labeled.
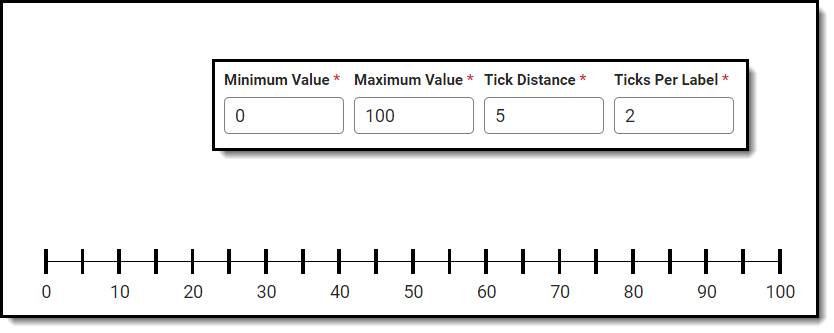
- An example of a number line with the Min Value, Max Value, Tick Distance, and Ticks Per Label fields shown.
- Snap to Tick: If marked, when the student places an answer option on the number line, it automatically moves to the closest tick
- Exact Match: If not marked, a Response Accuracy Threshold field displays. If the student places an option within the entered threshold, the answer is marked as correct. For example, if the correct answer is 40 and Response Accuracy Threshold is 3, placement on the number line from 37 to 43 will be considered correct. If marked, the student must place the option exactly correct to be scored as correct. Snap to Tick should also be marked if Exact Match is.

Matching
For Matching questions, students match stimuli and responses. Students are presented with a list of stimuli with a Response dropdown list and they select the correct Response for each stimulus.
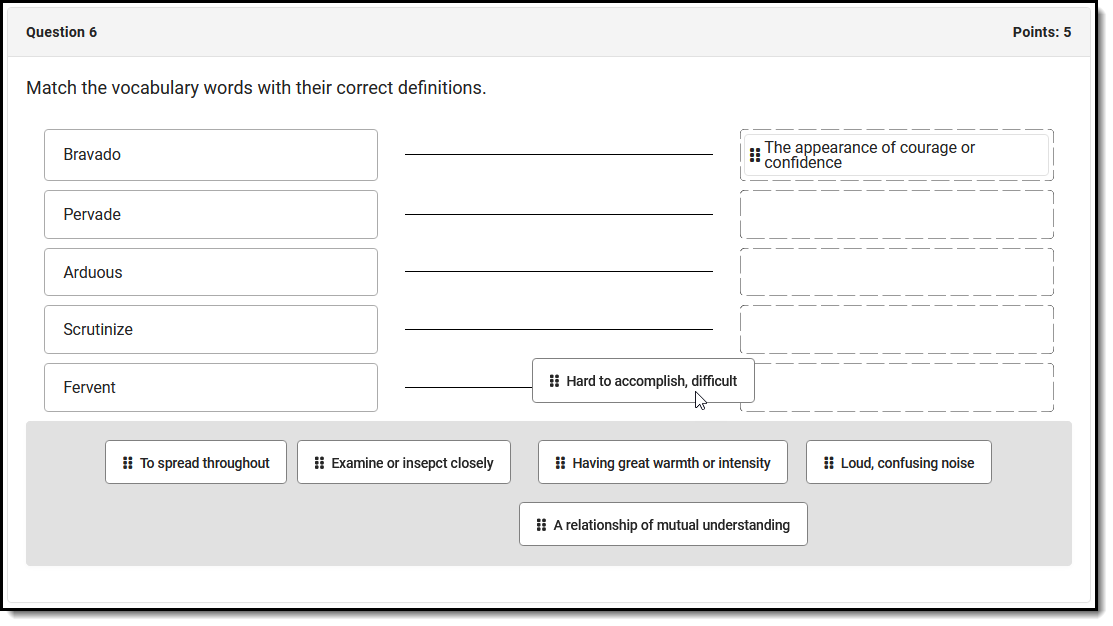 Drag and drop a response to its correct stimulus.
Create a Matching Question
- Enter the question text in the editor.
- Indicate if the question should Allow Partial Credit. If marked, students receive points for the question based on how many matches they got correct. If not marked, the student must get all matches correct to earn any points for the question.
- Indicate if the question allows Non-Unique Answers. If marked, the same response can be selected for multiple stimuli. If not marked, each response can only be selected once.
- Enter Stimuli.
- Enter Response options. You can enter more responses than you have stimuli to create distractor responses. Responses display in the same order that you list them; randomizing responses is recommended.
- For each Stumulus, select the correct response in the dropdown list.
- If desired, expand Correct Answer(s) and Settings to verify question setup.
- Click Done when finished.
Ordering
For Ordering questions, students drag and drop items into the correct order, or use the dropdown list to indicate the order.
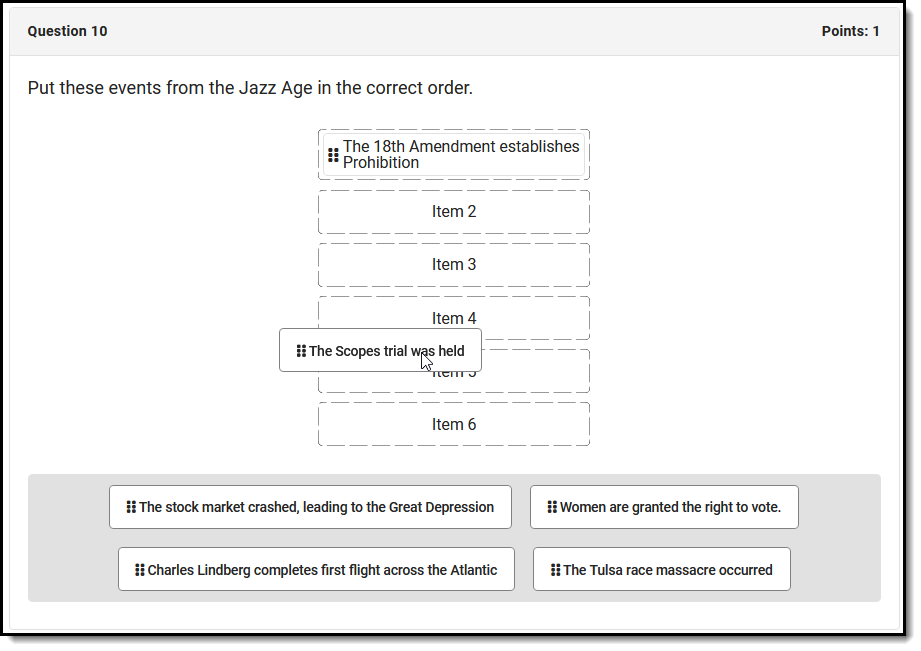 Drag and drop options into the correct order. | Create an Ordering Question
|
 or by selecting an order number in the dropdown list at the right. The order of items is randomized when presented to students.
 Numerical
For numerical questions, students fill in the blank with a numerical answer. Students can only type numbers, letters are not accepted.
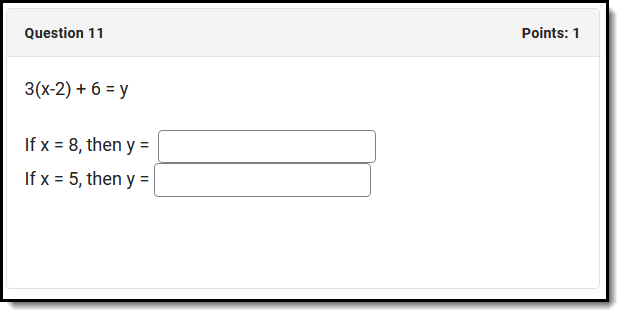 Numerical questions can only be answered using numbers.
 Create a Numerical Question
- Enter the question text in the editor. Wherever there should be a blank for students to fill in, click the Add Blank Response button . Each blank response corresponds to an answer below, Response 1, Response 2, etc.
- Indicate if the question should Allow Partial Credit. If marked, students receive points for the question based on how many blanks they fill correctly. If not marked, the student must fill all blanks correctly to earn any points for the question.
- For each blank response (Response 1, Response 2, etc), indicate if the student's answer must be Exact or fall within a Range.
- For Exact Answer(s), enter the correct answer and add additional correct answers if applicable. The student's answer must match one of the possible answers to be considered correct.
For Range, enter a range of possible answers. The student's answer is considered correct if it falls on or within the range of numbers entered.
- For Exact Answer(s), enter the correct answer and add additional correct answers if applicable. The student's answer must match one of the possible answers to be considered correct.
- If desired, expand Correct Answer(s) and Settings to verify question setup.
- Click Done when finished.
